Tuesday, 10 July 2012

Teddy Bear Baby Quilt - Part 1

Sometimes I will be inspired to make a quilt from just one fat quarter of fabric and this is what happened here.

 This is the FQ  and the teddy bear drawing I did for the appliqued center block.


I used Bondaweb to build up my design.....

... then machine appliqued the shapes in place.


I kept the border of the main fabric wide so as not to loose the pretty pattern.

Getting bigger......

I made these blocks for the next round but decided that it didn't look right and I didn't like them.
Onto plan B....

Plain border ?   Nah  didn't like that either.


Finally decided on a stripey border which I think looks nice.


Couldn't resist putting some feathersin the beige border.


To my disgust, after I finished the quilting, I realised  I had nothing suitable for making the binding, which I need to cut on the bias.
So at this point I will leave it here until part 2.   I need to get to the fabric shop pronto.
Hope you come back to see the finished quilt.
Enjoy your day
Rhianon.

Linking up with Connie's blog Quilting By the River.  Why not go and check out the work on display there ?

Saturday, 7 July 2012

TUTORIAL - Applying Transfer Foils with Bondaweb

You can add special effects to your work such as transfer foils using Bondaweb.
Here's how:


These are transfer foils.  They come in a range of colours and I got mine from a quilt show.  If your local shop does not have them, try a craft retailer or online. 


Choose your design to have the transfer foils applied to.  Using Bondaweb cut out shapes and apply them SMOOTH side up with a hot iron ( no steam ) directly onto your design.
Now peel off the paper from the bondaweb.


Lay the transfer foil coloured side UP over your design.


Next, lay a piece of grease proof paper/ baking parchment over the foil and press with a hot iron ( no steam) for a few seconds.


Gently peel the foil from the design and the you will see where the colour has been transfered onto the bondaweb.


Feel free to finish your design with any stitching you like.

A word of caution here , I do not know if the foils are washable after they are applied as I have not finished this piece yet and it was my first time of using the foils.
I have a feeling they may be suitable for art quilts only but I will come back and let you know how this quilt turns out after washing.


Have fun with your foils!
Rhianon.

Tutorial - Using Bondaweb.

I had a request to do a turorial on how to use bondaweb.  So here it is:


First of all you need to choose your design and draw it on paper.  I've copied the teddy bear from the fabric here but your design could be absolutely anything.  If you are a beginner try a simple shape like a circle or a heart.


You will notice that the bondaweb has a smooth side and a rough side.  From your drawing trace your design on to the SMOOTH side.  Cut out your shapes an 1/8" away from your drawn line.


Using a hot iron with NO steam gently press your bondaweb onto the WRONG side of the fabric.


Cut out your shapes using a sharp pair of scissors.   There will be a layer of paper on the back now and this needs to be peeled off gently.   The wrong side of your fabric will be left with a layer of adhesive on it.


Place your shapes right side up on the background fabric and gently press with a hot iron.
The shapes will now be stuck to your fabric.

Keep adding to your chosen design until your are ready to applique your shapes.

The shapes can either be appliqued by hand using a blanket stitch or they can be worked on a sewing machine.  I like to use a small zig zag stitch with the stitch length set vey low so the stitches are close together.


LETTERING


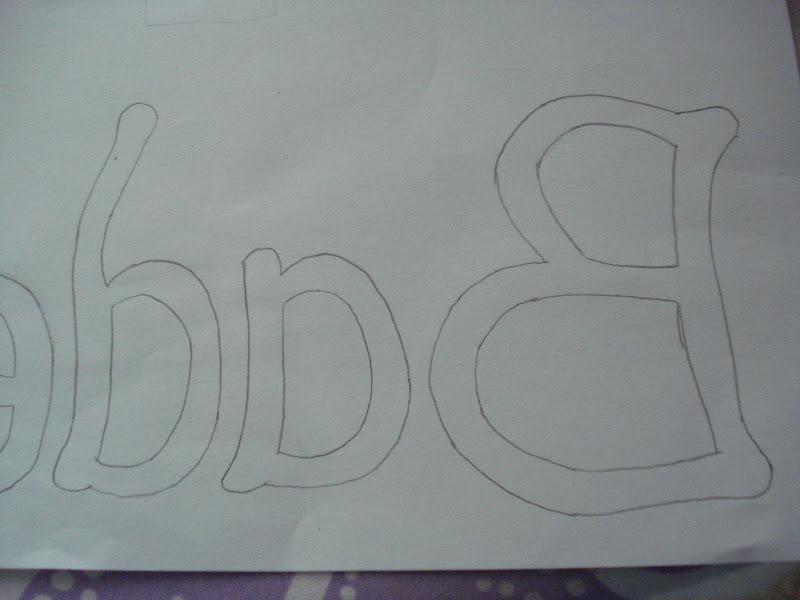
If you would like to add lettering simply draw it out on paper.


Then using a light box or if you don't have one, do as I did and tape it to a window, trace the lettering from the right side to the wrong side.


Now using the letters reversed, trace them this way onto the SMOOTH side of your bondaweb.
Cut them out and iron them down onto the WRONG side of your fabric as before.

When you cut the letters out and turn them over they will be the right way round.  Apply them to your background fabric and applique.


Another sample of lettering.
I love using bondaweb - it's so quick and easy.  Have fun with yours.
Rhianon.


Related Posts Plugin for WordPress, Blogger...