Showing posts with label quilted feathers. Show all posts

Thursday, 27 October 2016

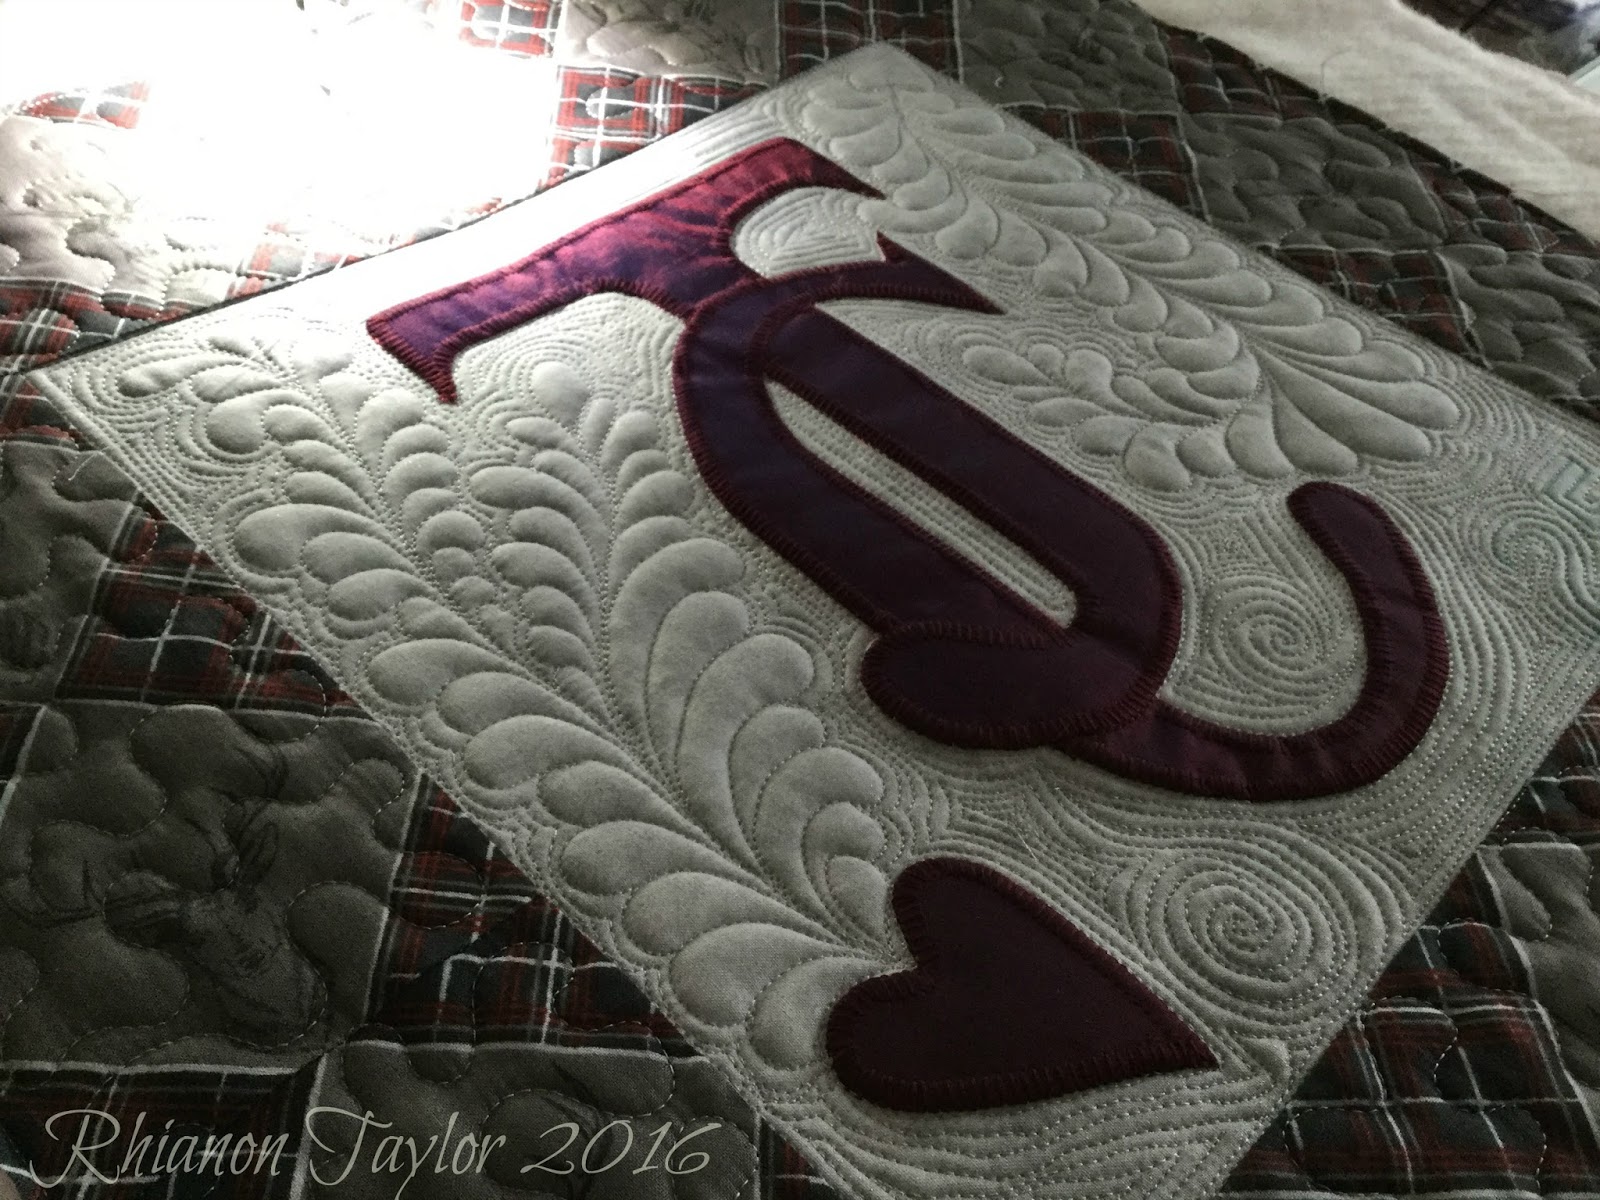
Wedding Anniversary Cushion.


My sister in law Jackie and her husband Colin will be celebrating their 25th wedding anniversary very soon so I thought I would make a little something to mark the occasion.


Fun to make and turned out pretty nice.  Jackie and Colin loved it!
Back to the sewing now.......

Saturday, 13 August 2016

Customer quilts- Linen cushions and lots of feathers!


These are the second set of cushion covers I quilted for Alison who made the felted coin cushion covers that I posted about in a previous blog. You can see that here.
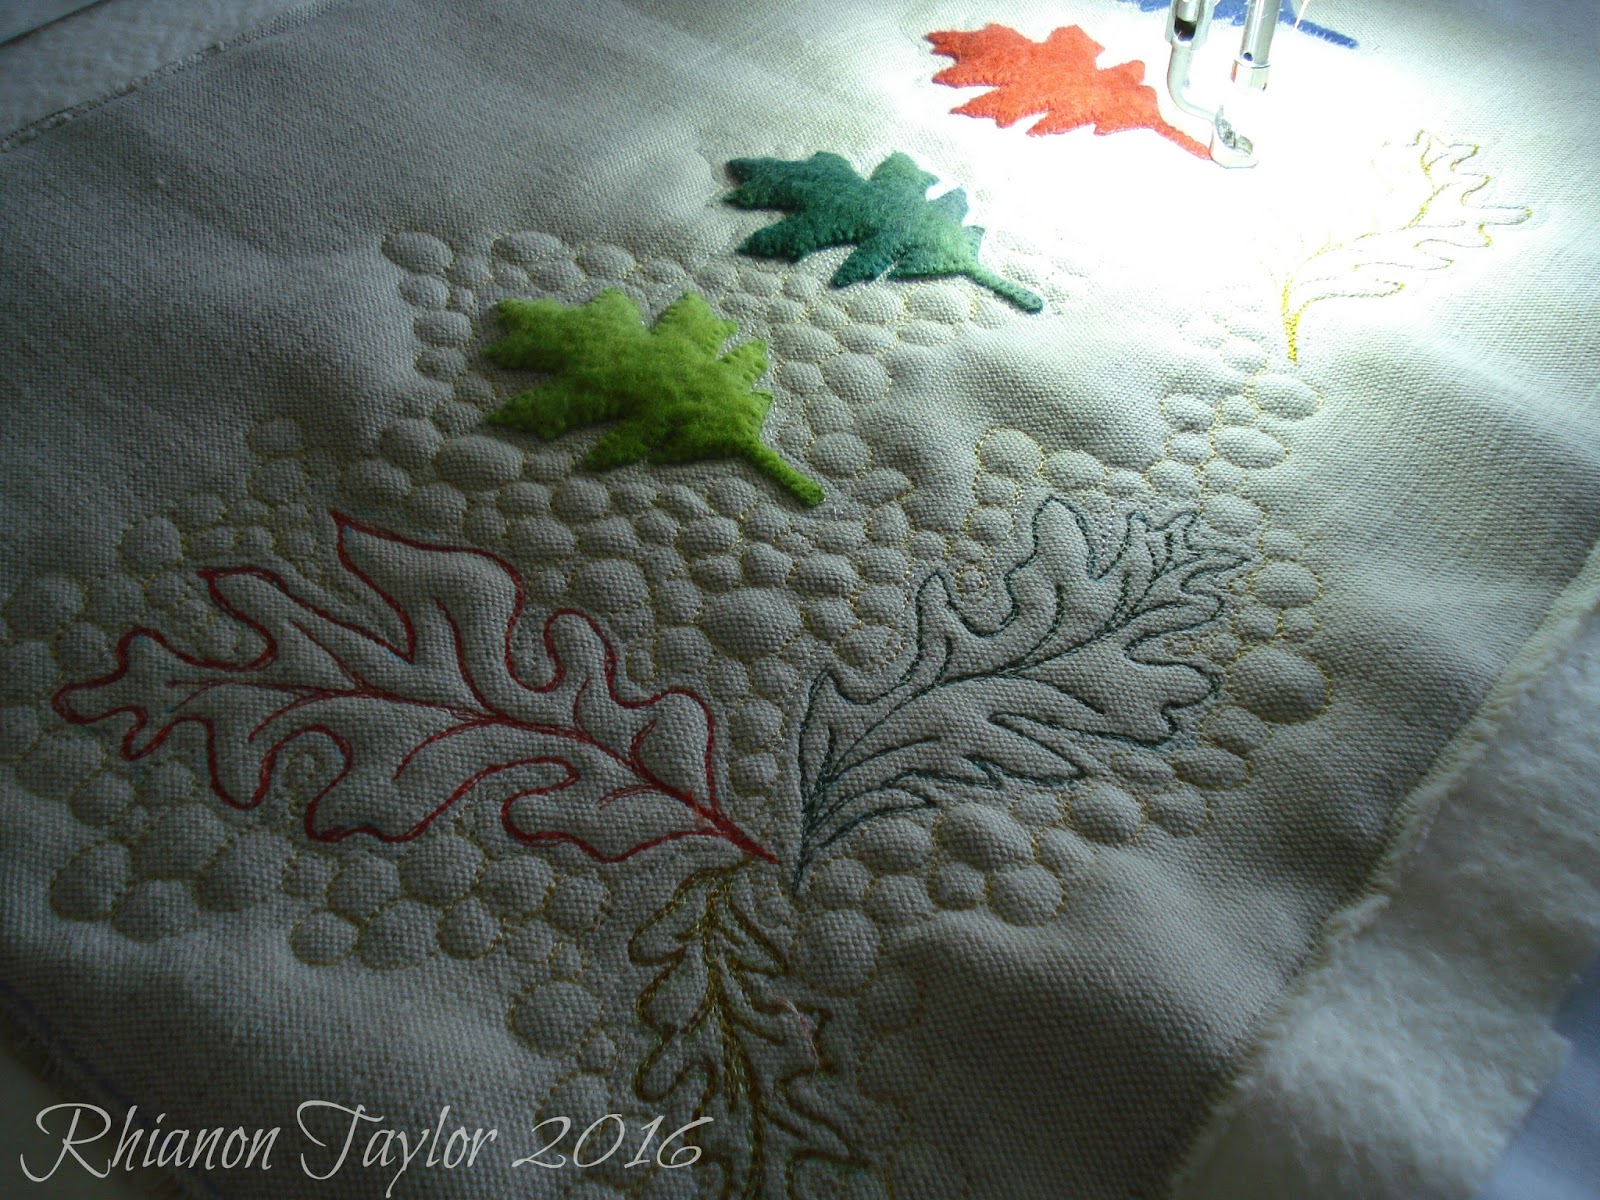
Again these were made from linen but this time with felt leaves.  Alison gave me free reign to do what I wanted.

 This is a small sketch I did before I started.


 I had to go over the leaf shape several times to get a nice thick line.  I used Glide threads and the wadding is Hobbs 80/20.

 I decided on a pebble background fading into bigger leaves around the edges.


Next up was the second quilt for Gail.  At first glance it seemed fairly straight forward but the blocks in the center were all different and there were two wide borders on two sides of the quilt.
Gail requested some feathers in the quilt.


 I love the autumnal colours of this quilt and the beautiful fabrics.

 I decided to do a continuous feather in the two large borders.


 In the center blocks I kept the design the same for all of them.  A large outlined feather going from corner to corner.


 I love how this quilt turned out. Happy to say Gail was very pleased too!

Thanks for visiting my blog today. Be back soon with more quilting!

Sunday, 27 March 2016

Crochet Butterfly


I have been doing quite a bit of crochet lately and I thought it would be fun to merge quilting and crochet together.


I found this butterfly as a free pattern on MyPicot.  It was too big for the project I had in mind so decided to make a quilted setting for it to go on.
I appliqued some leaves and quilted on my Q'nique using 2 layers of Hobbs 80/20 but did not really think two layers added much.

 I used a fine no8 crochet cotton and a 1mm hook to make the flower blossom and a slightly thicker cotton to crochet the branches. An embroidered French knot in the center finishes the flowers.


 The finished piece is quite small, measuring just over 12" square.
I quite like it and will probably hang it in my workroom somewhere.
Now onto something bigger.......
Happy quilting.
Rhianon.

Friday, 16 October 2015

Quilted Vintage Tablecloth

A while back I joined a group on Facebook called Quilting Vintage. It's all about quilting old embroidered tablecloths, runners, doillies and handkerchiefs.
Taking something old and beautiful, giving it new life and making it even more beautiful.

A lot of beautiful work on that page and I wanted to try my hand at it.

After scouring the local charity shops, I found these at £1 each.


Couldn't wait to get home and load up the frame.  I started with the pale mint green one which has pretty hand embroidery.

I didn't really have a plan so off I went.  I started with the embroidered corner motifs and then moved down to the middle.


A flower in the center seemed a good starting point.


I then rolled the frame back and filled in the background with pebbling, eventually moving down and finishing the final two corner motifs.


Its all freehand, unmarked and was a lot of fun.


These are a brilliant and inexpensive way to practice quilting.  I'm thinking what to do with the next one now........
Thanks for visiting today
Happy stitchin'
Rhianon.

Saturday, 11 April 2015

Jelly Roll Quilt


Hello quilty friends

I've been keeping myself busy working on a couple of new quilts.
This is the second time I've used a jelly roll and I decided to use a little design I doodled a while back.   First time I used a Bonnie Hunter pattern.

The intention was to use lots of half square triangles - 2 1/2" sounded good to me.


I didn't want to make this too big so it could be a lap quilt or a wall hanging.
Then my favourite part - the quilting.....  

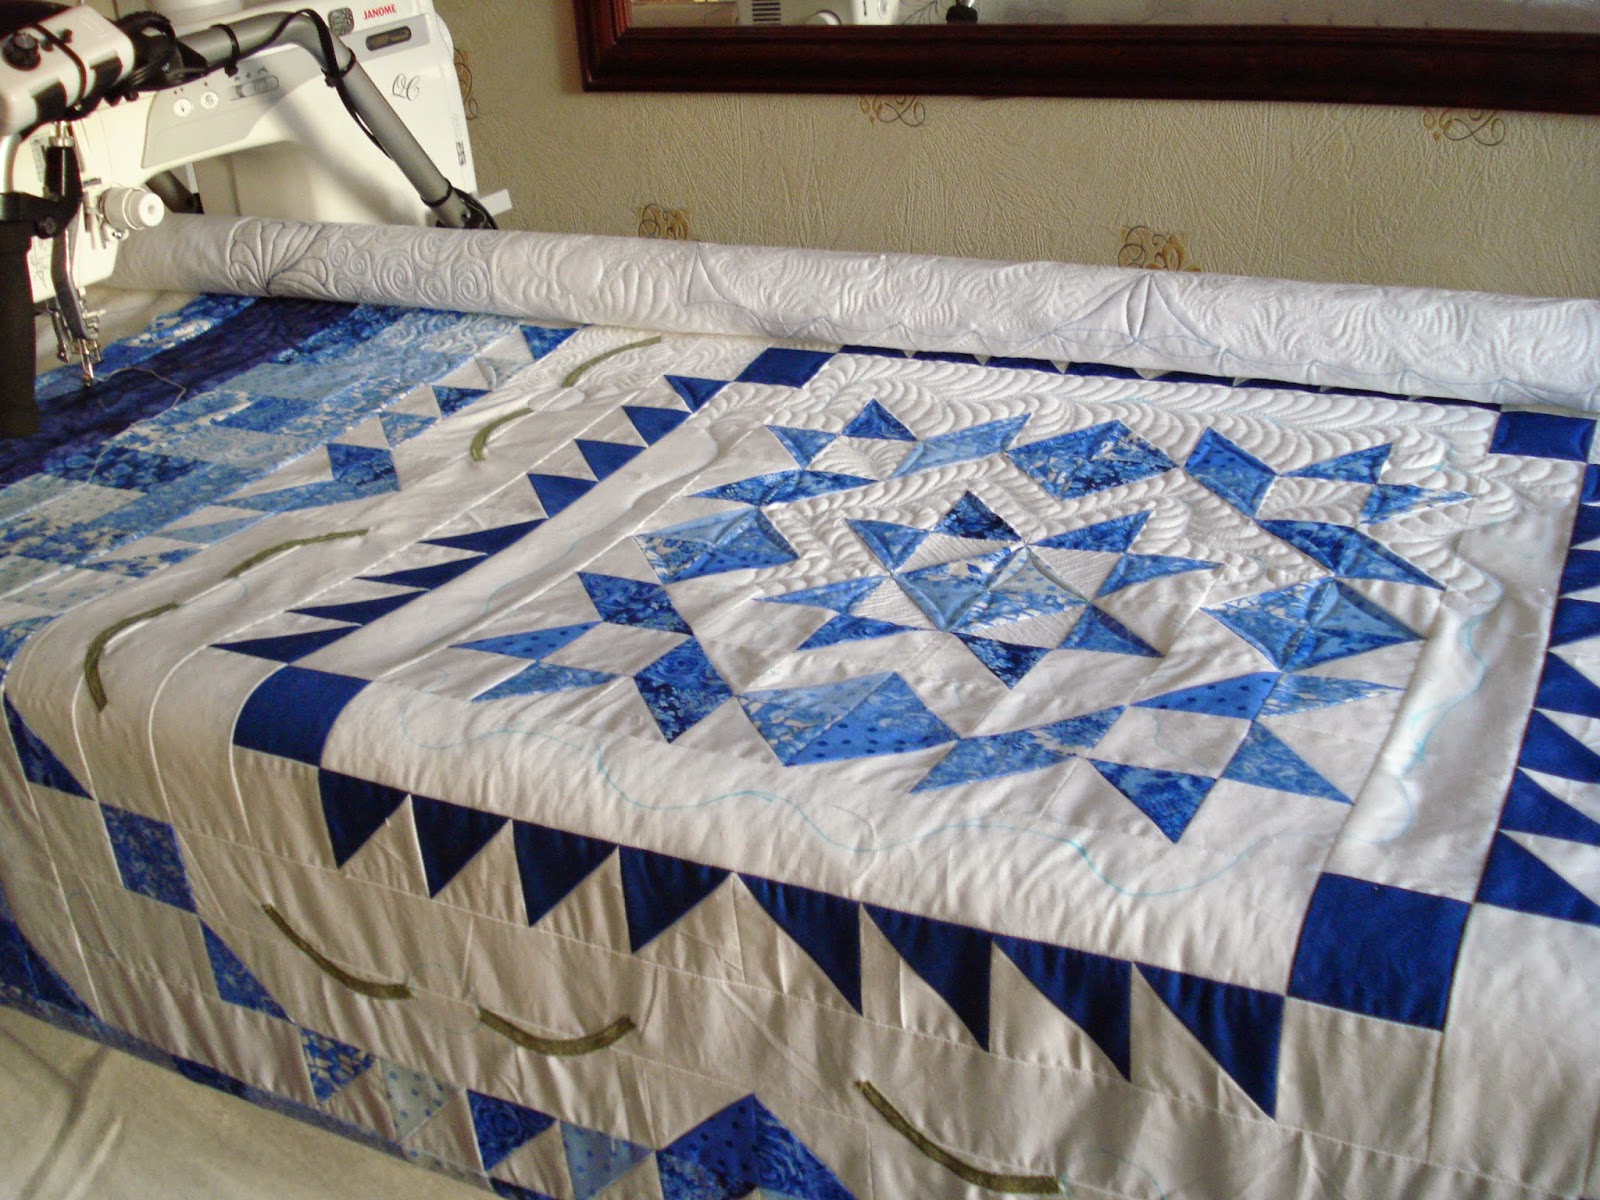
For the first time ever I actually marked the spines by measuring and using a curved ruler so the feathers are quite uniform.   All my work is freehand and I don't have a stitch regulator on my machine.  I would love to be able to do ruler work and that is high up my to-do list.
I used one layer of Warm and Bright wadding.


 Some swirly fill for this bit....

 Freehand feathers in the corner.......

 This part was quite a challenge.  I wanted the feathers to fit into the space......

 Pretty pleased with how they are looking.

 Same again for these feathers, I wanted them to trail around, fitting the space.

 You can see from this photo how I have advanced the frame to work the center section.  I will roll back and finish the sides.  Not sure if this is how you are supposed to do it, but its working for me. I've never had a long arm lesson in my life so everything I do is by trial and error.
 A nice sunny photo..

 Here is the center part finished, still have to get rid of the blue lines.


Some McTavishing is my background fill for this bit and it will have appliqued 3D flowers when done.
At this point my machine decided not to play nicely.  It started skipping stitches when sewing upwards towards the left.  I ran through my checklist several times, new needle, cleaned, oiled, tension check.  I managed to get it working again for all of 5 minutes so I got hubby to take the machine off the frame so I could have a closer look.
Still in free motion mode I did a test sample and it sewed perfectly.  Just cannot figure that out.
Anyway, the machine will be going back on the frame and I hope to get this finished.  It is 3/4 of the way done.  Its been very frustrating.
Here is the sample I stitched:

Wish me luck and I hope to have a finished quilt to show next time.
Happy sewing
Rhianon.

Related Posts Plugin for WordPress, Blogger...