Saturday, 7 July 2012

Tutorial - Using Bondaweb.

I had a request to do a turorial on how to use bondaweb.  So here it is:


First of all you need to choose your design and draw it on paper.  I've copied the teddy bear from the fabric here but your design could be absolutely anything.  If you are a beginner try a simple shape like a circle or a heart.


You will notice that the bondaweb has a smooth side and a rough side.  From your drawing trace your design on to the SMOOTH side.  Cut out your shapes an 1/8" away from your drawn line.


Using a hot iron with NO steam gently press your bondaweb onto the WRONG side of the fabric.


Cut out your shapes using a sharp pair of scissors.   There will be a layer of paper on the back now and this needs to be peeled off gently.   The wrong side of your fabric will be left with a layer of adhesive on it.


Place your shapes right side up on the background fabric and gently press with a hot iron.
The shapes will now be stuck to your fabric.

Keep adding to your chosen design until your are ready to applique your shapes.

The shapes can either be appliqued by hand using a blanket stitch or they can be worked on a sewing machine.  I like to use a small zig zag stitch with the stitch length set vey low so the stitches are close together.


LETTERING


If you would like to add lettering simply draw it out on paper.


Then using a light box or if you don't have one, do as I did and tape it to a window, trace the lettering from the right side to the wrong side.
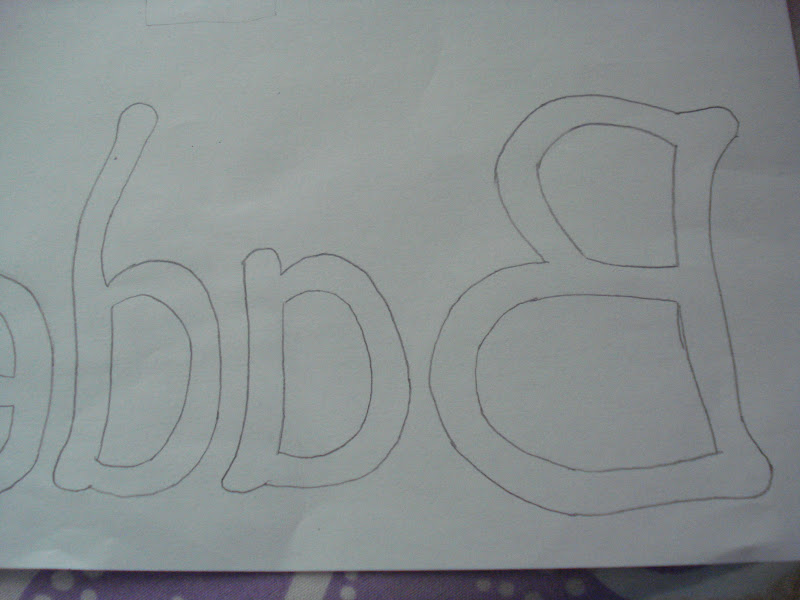

Now using the letters reversed, trace them this way onto the SMOOTH side of your bondaweb.
Cut them out and iron them down onto the WRONG side of your fabric as before.

When you cut the letters out and turn them over they will be the right way round.  Apply them to your background fabric and applique.


Another sample of lettering.
I love using bondaweb - it's so quick and easy.  Have fun with yours.
Rhianon.


Saturday, 23 June 2012

Nearly there...........

Quilting on the butterfly quilt is coming on at a cracking pace this week.  I've really been working hard and it's paying off.


Click on the photo for a close up view.


This is the back.


After working all those pebbles it was a nice change to move onto the flowers.  These were the only part of the quilt top that I marked before stitching. Everything else is freehand.


I worked a swirly circle pattern on the rainbow border, changing my thread according to the colours. I used Guterman Sulky varigated threads.

I still have to go back and do some more work on the butterflies and also on the churn dash blocks but it is not far from being finished now.  I even have the binding all made and ready to go!


This is how it's looking on my bed ... I'm loving how this one is turning out - pity it doesn't match the decor in my room!

Off to do the food shop now then back to my workroom.
See you all next time.
Rhianon.

Tuesday, 19 June 2012

Kaylee's Owl Cushion

Over the weekend I found time to make this cushion for a little 3 year old girl who is fighting ( and winning !) cancer.   She is the great grandaughter of my friend Miriam who lives in America.


It all started with this fabric, which Miriam had sent me quite a while ago...


Cute eh?


I drew my version onto card and used this to work the applique from.


Then I added Kaylee's name, a few borders and it was tme to quilt.

I kept the quilting simple - a bit of stippling behind the owl and stitching in the ditch with invisible thread.


For the back I used this cute lime green owl fabric - I love purples and greens together.


A little ruffled edging finishes the cushion nicely and it is all ready to be posted.

Today I'm linking up with Connie's excellent blog, Quilting by the River for her linky party. 
Back to quilting the butterfly quilt for me today - nearly at the outer border!!!!
See you all again soon.
Rhianon.
Related Posts Plugin for WordPress, Blogger...